
AstroGuider
Getting started with the INDIGO agents based backyard astrophotography application suite
About eight years ago we started to develop a software with the idea to make Apple macOS and iOS the first class platforms for backyard astrophotography.
At the beginning, the most important task was to add as many hardware drivers as possible. So we used the existing INDI framework. Later we focused on the performance and reliability and transferred the whole development to INDIGO framework.
In the latest generation we made so far the most radical change. We left the traditional client server approach and switched to multi-tier agent based architecture allowing even higher performance and reliability.
Core and utility applications of astrophotography suite
Unlike the other similar systems, our suite is not a single monolithic application, we use standalone loosely coupled applications instead. This approach has some advantages and some drawbacks. The major advantage is that you can select just tools you really need and use them only when you really need. The disadvantage is that you need to understand how the applications work to configure them to talk to each other properly.
There are four core applications and a couple of utility applications in our suite. The core applications are:
- AstroImager, the application for controlling the main camera and the associated filter wheels, focusers and the front end for "Imager Agent",
- AstroDSLR, a very similar application, but intended specifically for tethering DSLRs and another front end for "Imager Agent",
- AstroTelescope, the application for controlling the dome and the mount and the front end for "Mount Agent" and
- AstroGuider, the application for controlling the guider camera and guider port of the mount and the front end for "Guider Agent".
The utility applications are:
- INDIGO Server, the standalone server for building distributed systems,
- INDIGO Control Panel, the standalone control panel,
- INDIGO Script Editor, the standalone INDIGO script editor,
- INDIGO Dashboard, the highly configurable dashboard for low level server control,
- FITS Preview, the fast previewer for FITS, XISF and INDIGO RAW formats and
- Astrometry, the macOS port of substantial part of Astrometry.net project.
Please note, that every core application contains an embedded server, control panel and script editor. The standalone versions are intended for advanced use and are not necessary in the most cases.
About INDIGO and INDIGO agents

INDIGO is a system of standards and frameworks for multiplatform and distributed astronomy software development.
You can consider it as a next generation of INDI, based on layered architecture and software bus. INDIGO uses the same astronomical hardware abstraction as INDI, but removes some of its design limitations, dramatically improves its performance in some typical scenarios and overcomes license restrictions to allow both non-commercial and commercial use.
If you don't want to, you don't need to care about INDIGO complexity and its distributed nature. Each application contains embedded INDIGO Server together will all necessary drivers. You can just use it.
Although INDIGO was always well prepared for a distributed computing, for many situations the traditional client/server is not the best approach. The most important driver for the change was implementation of webGUI on INDIGO server. The thin client running in a browser needs a much smarter backend than INDIGO server itself, it needs a server side application logic. We use term INDIGO agent for this code, acting on the server side and controlling the local devices on behalf of the client.
Such an agent is independent of the connection to the client. The client can configure it, disconnect and keep it running, doing its job and connect later to monitor the status or to take the results. The communication between the driver and the agent is also not limited by network bandwidth as far as they both live in the same INDIGO server and can communicate to each other over the software bus on a procedure call speed.
And last but not least, as far as agent code contains the vast majority of application logic for typical operations supported by the applications for amateur astronomy. Implementation of the client is in this case just implementation of native GUI for a given operating system. It is faster, easier and possible bugs can be fixed on one place.
To learn more about INDIGO or INDIGO agents or to ask a question, visit FAQ section of our users forum.
What's new in the version 4.0
- The initial version of the 4th generation.
- INDIGO framework version 2.0.148.
AstroGuider overview
AstroGuider is a front end to Guider Agent. Its purpose is to control the guiding camera, its guider port and/or the connected mount. It can be calibrated automatically or manually, you do not need to take care about camera orientation or pixel scale.
It can use various drift detection and drift response algorithms and can autodetect one or multiple stars to guide with. It can also cooperate with AstroImager or AstroDSLR (e.g. for dithering) or with AstroTelescope (e.g. to stop guiding when the mount is slewed to another target).
It can control many devices supported by built-in INDIGO drivers or it can use any 3rd party remote INDIGO or INDI driver. Out-of-the-box it contains INDIGO drivers for the following cameras, mounts and guiding devices:
- CCD and mount simulator drivers,
- Atik CCD driver (Intel only),
- ZWO ASI CCD and guider drivers (doesn't work with non-S ASI120MM/MC, Intel only),
- IIDC CCD driver (both USB and FireWire cameras),
- QHY CCD driver (Intel only),
- SBIG CCD driver (vendor SDK must be installed, Intel only),
- Meade DSI CCD driver,
- Orion SSAG/QHY5 CCD driver,
- StarlightXpress CCD driver,
- Moravian Instruments CCD driver (Intel only),
- ToupTek CCD driver (Intel only),
- AltairAstro CCD driver (Intel only),
- UVC (USB Video Class, e.g. SVBONY SV205) CCD driver,
- EQMac guider driver (obsoleted on macOS Mojave),
- CG-USB-ST4 driver,
- Shoestring GPUSB driver,
- LX200 mount driver (supports Meade, AvalonGo, Losmandy Gemini, 10micron, EQMac, Astro-Physics GTO and OnStep dialects),
- NexStar mount driver (supports Celestron and Skywatcher dialects),
- Takahashi Temma mount driver,
- iOptron Mount driver,
- SynScan/EQDir mount driver,
- ExploreScientific PCM8 mount controller driver,
- RainbowAstro mount driver,
- NexStarAUX mount driver (WiFi only).
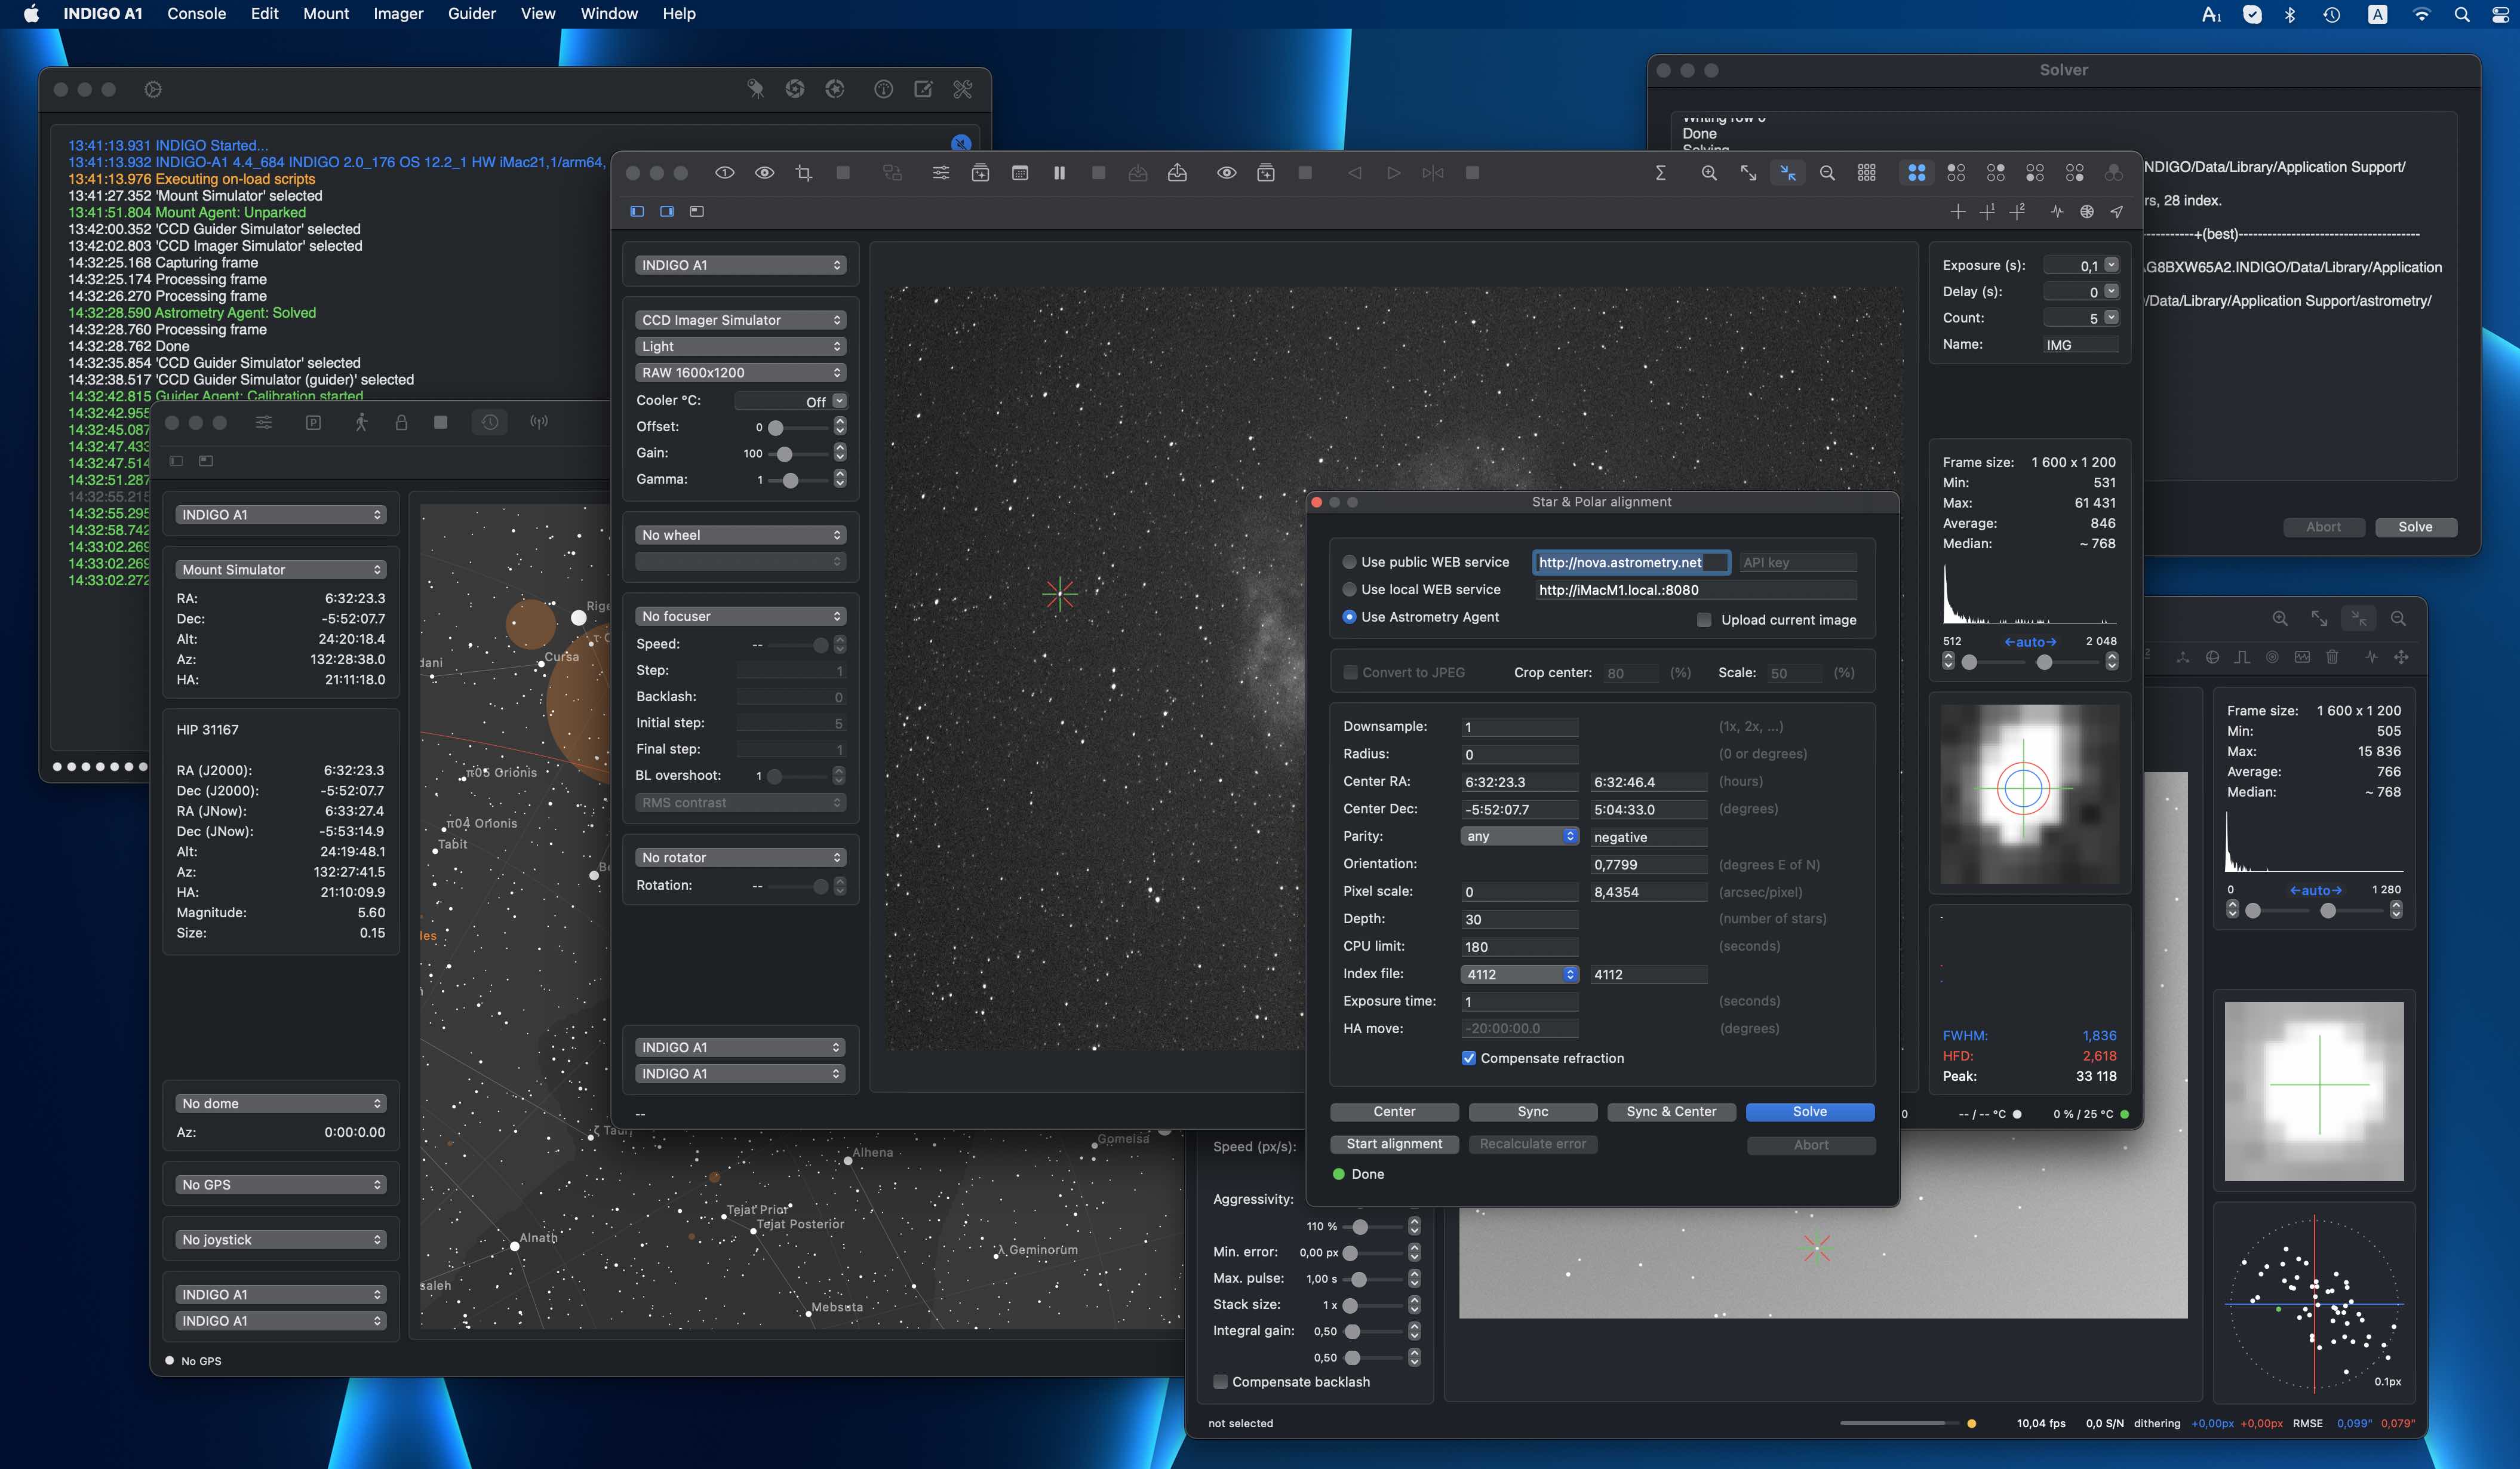
AstroGuider graphical user interface
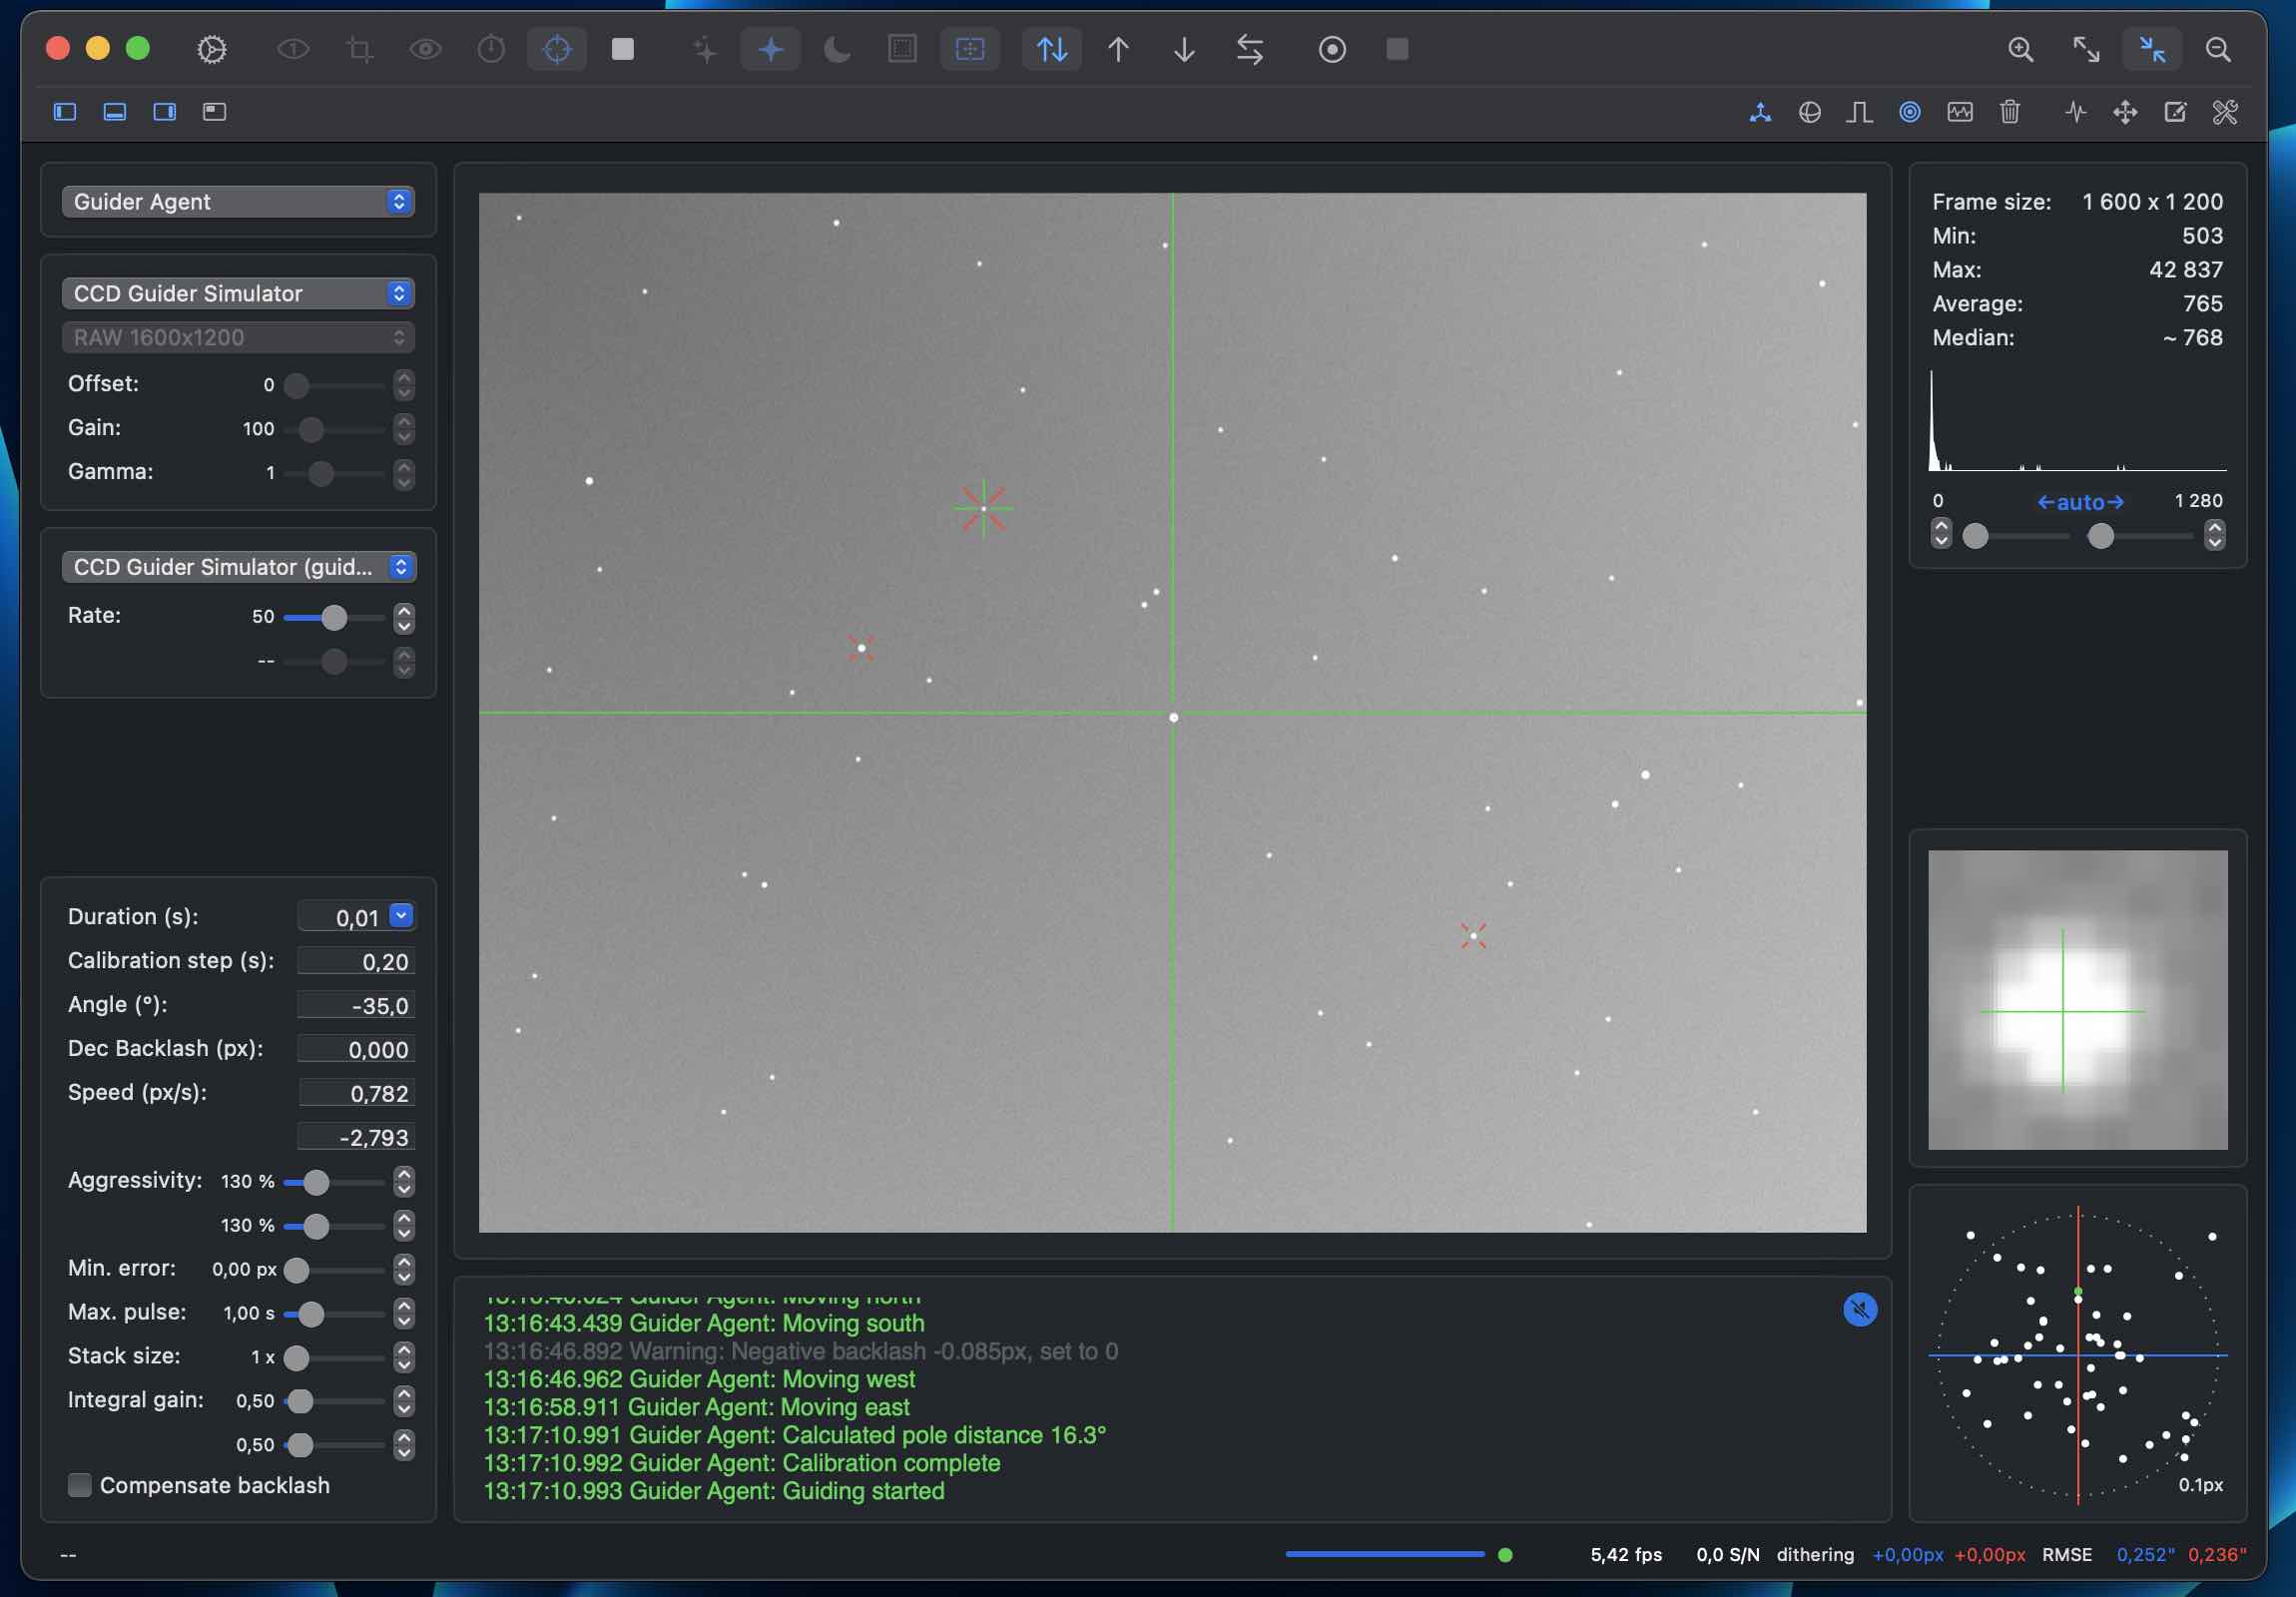
On the left side of the main window, from top to bottom, there are controls for selecting an active guider agent, active camera and its configuration, active guider device and its configuration and the configuration of the guider agent.
On the right side of the main window, from top to bottom, there are histogram panel with black and while point settings, a detailed view of the selected star and a circular or regular graph with drift or correction pulses.
In the middle there is a preview of the recently captured image and the messages from both AstroGuider and remote INDIGO servers and drivers.
On top of the window there are two rows of toolbar buttons (move the mouse pointer above the button to see a tooltip with an explanation) and on the bottom of the window is status.
Different parts of the window may be shown or hidden with four show/hide panes buttons on the left side of the second toolbar row. All other application panels, script and control panel windows can be shown with buttons on the right side.
The safest way how to get familiar with different AstroGuider functions is to select simulator devices and play with them a little bit. Use "CCD Guider Simulator" and "CCD Guider Simulator (guider)".
AstroGuider preferences

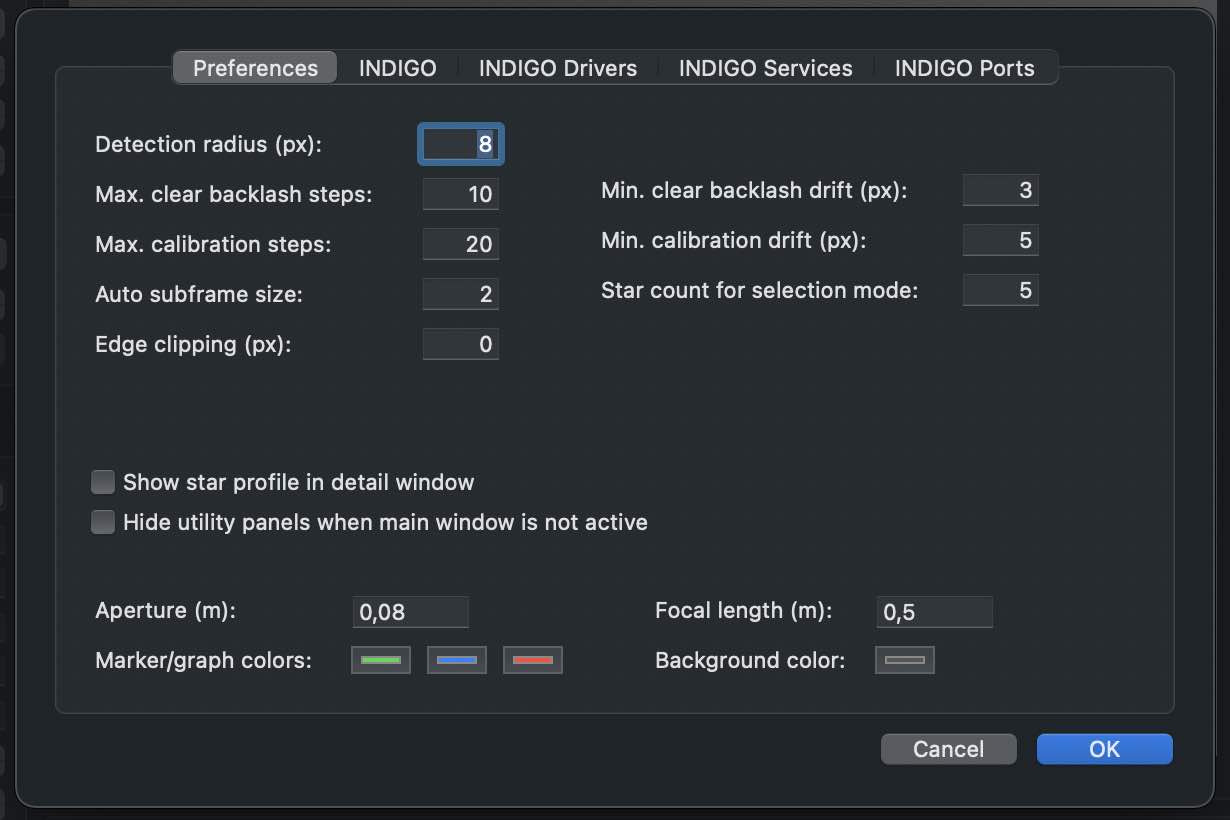
In AstroImager preferences you can set various settings for AstroImager GUI and for the embedded INDIGO client.
On the first pane you can configure the user interface and some common parameters for star detection and for the calibration algorighm. Unless you know what you are doing, keep the default values.
On the INDIGO pane you can configure the port number, service name and type for built-in INDIGO server. Access token is a password used to access protected remote INDIGO services.
Log level is logging verbosity for GUI and built-in INDIGO server. Read this post to learn how to make a debug or trace log.
Configuration profile is the profile used to save and load persistent state of the INDIGO server and drivers. Don't change it unless you know what you are doing.
On the INDIGO Drivers pane you can enable or disable different INDIGO drivers. Don't enable drivers you don't need, all loaded drivers consume resources of your computer and some of them are mutually exclusive. Check this page to learn more about individual INDIGO drivers.
On the INDIGO Services pane you can see automatically detected INDIGO services and also to configure some of them manually, e.g. legacy INDI servers or services running outside your local network.
On the INDIGO Ports pane you can configure a serial port for those drivers which need it. Note, that these settings supersede the saved value of PORT property of the driver.
Capture preview, calibration and guiding

To capture preview or to set subframe make sure the camera is selected on the active guider agent. You can select a subframe on a previously captured preview frame with the mouse. The subframe definition will be used on all subsequent captures. You can reset it by clicking the button again without a selection.
To calibrate the guiding make sure the camera and the guider device is selected on the active guider agent. If a star selection mode you can also select the guiding star, otherwise the best star will be detected and selected automatically.
During the calibration, first the backlash is cleared and then the mount responses to guiding pulses are measured. The duration and the calibration step values are used. If the calibration step is too short or too long in respect to the calibration parameters configured in preferences, it may be increased or decreased automatically.
Once capture on a remote imager agent is finished, you can download the images to the folder configured in the agent setup panel. For the local image agent this step is not needed, the frames are saved immediately.
If both camera and guider device are selected on the active guider agent and the calibration was successful, you can start guiding.
Drift detection methods

You can select one of three basic detection modes:
Star field detection mode - it uses DONUTS algorithm, works with the whole frame and doesn't need any selected star. For this mode is very important to achieve sufficient S/N ratio, so make sure you use long enough exposure time. You can learn more about basic DONUTS algorithm in this paper. Some improvements, like automatic gradient removal or edge removal, are specific to INDIGO guider agent.
Selected star detection mode - it uses a centroid algorithm, works with one or multiple stars and these stars can be either selected manually or automatically. You can optionally enable two additional features - to select a subframe around the selected star and to use multistar selection.
Sun and moon detection mode - it uses the centroid algorithm as well, but it is computed from the whole captured subframe. This mode can be used just for solar or lunar guiding.
Drift correction mode

You can select one of four correction modes:
North & South is the default mode. It corrects in both right ascension and declination axes and in the declination axis it corrects the drift in both north and south direction.
North only and South only modes correct the drift in the declination axis only in north and south direction. RA only corrects the drift in right ascension axis only. If this mode is selected, the drift in the declination axis is not evaluated.
Session recording

The guiding session can be saved to CSV (comma separated values) file for further analysis. To start recording, click on record guiding data, to stop it, click on stop recording button.
Fine tunning guiding
INDIGO guider agent uses Proportional-Integral (PI) controller to correct for the telescope tracking errors. Proportional or P means that it will attempt to correct for any random errors like gusts of wind, random bumps etc and most of the systematic errors. Integral or I means that it will look at the last several frames and compensate for any accumulated errors that are not fully compensated by the P component like residual errors of a bad polar alignment, residual periodic errors etc.
To learn more about finetuning the drift response algorithm read this paper.
Graphs


AstroGuider has one small graph pane in the right bottom corner of the main window. You can configure it to show either X/Y drift (in pixels), RA/DEC drift (in arcseconds) or RA/DEC guiding pulses (in seconds) and you can select either circular or linear graph.
You can also show a large graph panel showing all three graphs in both circular and linear form. In this panel you can also change the time scale.
All graphs can be reset by clicking the reset graph button.All graphs and all related values use the same colour encoding. Blue means X or RA while red means Y or Dec values. It is used not just by the graphs, but also by RMSE and dithering values in the statusbar.
Scripting AstroGuider

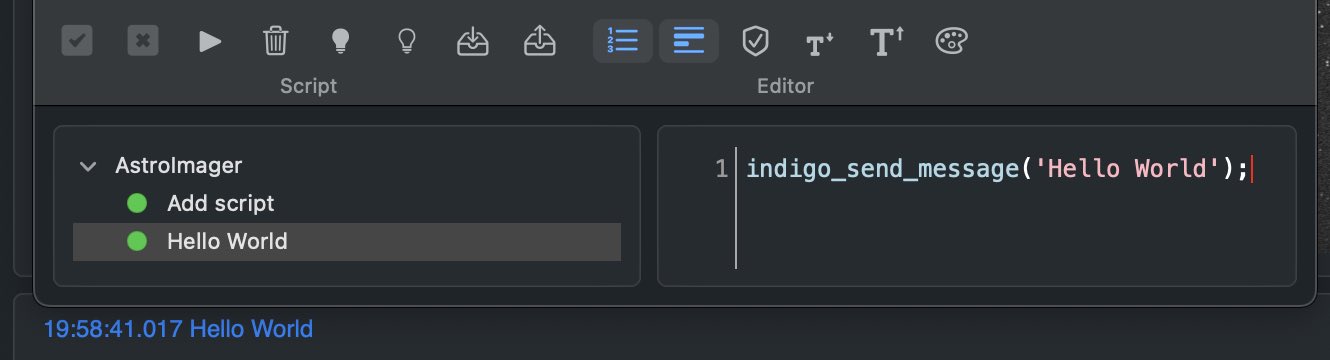
INDIGO Script is a built-in scripting language based on ECMA Script with binding to the INDIGO objects and functions. Scripts may be executed manually, on agent load or unload or registered as event handlers and triggered by any INDIGO events.
Scripts are executed by Duktape engine wrapped into a scripting agent. To learn more about the language, visit Duktape site.
To learn more about INDIGO bindings, read scripting agent README.
To see some real world scripts look at INDIGO Script subforum.
Low level INDIGO control with AstroGuider

In control panel you can manage all properties of all devices hosted by local INDIGO bus.
To change a property, navigate in device / Group / Property tree, enter new values of the items (changed values became orange) and click Set.
If you want AstroGuider to use changed values on the next start, save configuration in "Configuration control" property in "Main" group of the device. You can also set particular profile in "Profile selection" property first. Remember, that not all properties are actually persistent, values of some of them can't be saved, e.g. for security reasons.
AstroGuider device represents AstroGuider itself and can be used by scripting tools etc.
Please note, that embedded control panel can be used only to control local devices. To access remote devices you need full featured INDIGO Control panel.
Further questions?
Please contact us at info@cloudmakers.eu or bb.cloudmakers.eu.